How to Flush Car Engine Oil in 10 Easy Steps
If you’ve ever dealt with sluggish engine performance or worrying oil buildup, you’re not alone. Many car owners struggle with keeping their engines clean and running smoothly. Finding the right method to flush your car engine oil can feel overwhelming, but it doesn’t have to be complicated.
To flush your car’s engine oil in 10 easy steps, start by gathering quality oil flush, fresh oil, and tools. Safely prepare your car by parking on a level surface and warming the engine slightly. Drain the old oil and replace the oil filter.
Add the flush chemical, run the engine briefly to circulate it, then drain and refill with new oil. Check for leaks and dispose of waste properly. Keep following along to uncover detailed tips for a thorough flush.
Key Takeaways
- Warm the engine, then drain the old oil and remove the oil filter carefully to prepare for the flush.
- Add the recommended oil flush chemical through the filler and run the engine at idle for 10-15 minutes. Avoid high RPMs during flushing to prevent engine stress and ensure proper circulation of the flush.
- Replace the oil filter with a lubricated new one and refill the engine with the correct oil type and quantity.
- Check for leaks, verify oil levels, and properly dispose of used oil and filters at recycling facilities.
Gather the Tools and Supplies for Your Engine Oil Flush
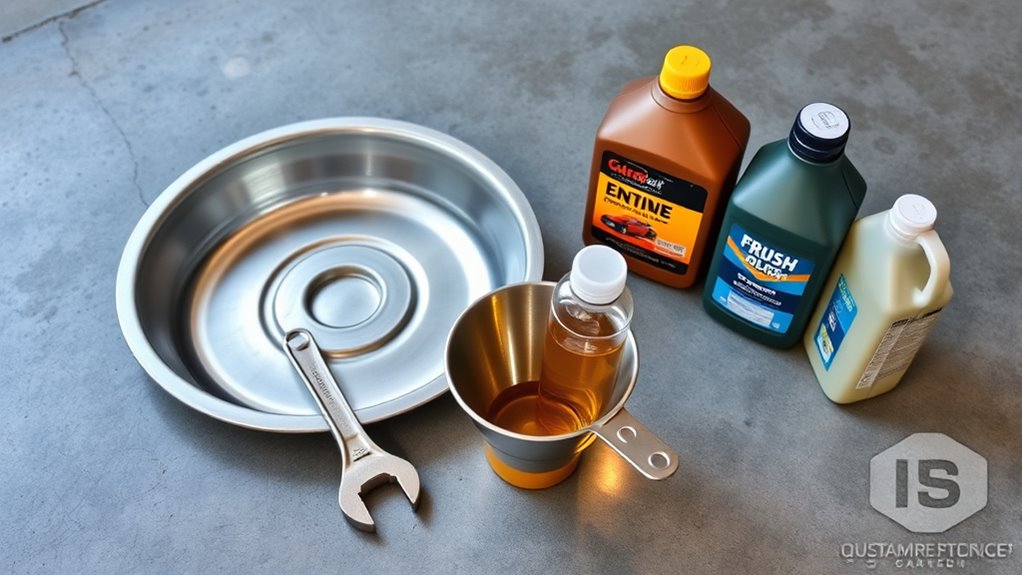
Before you begin flushing your car’s engine oil, make sure you’ve gathered all the necessary tools and supplies. Having everything ready helps you avoid interruptions during the oil change and keeps the process smooth.
Start with a high-quality engine oil flush additive designed to clean deposits inside your engine. You’ll also need fresh engine oil that matches your vehicle’s specifications, along with a new oil filter to replace the old one.
Don’t forget essential tools like a wrench or socket set to remove the drain plug and oil filter, a funnel for pouring oil without spills, and a drain pan to catch the used oil safely. Gloves and rags are handy to keep your hands clean and wipe up any spills.
Prepare Your Car for a Safe Oil Flush
Before you start flushing your engine oil, make sure the engine has cooled down enough so you can work on it safely. It’s always better to wait a little longer than to risk getting burned.
Next, gather all the tools you’ll need and keep them within easy reach. This way, you won’t have to stop halfway through looking for something, which keeps the whole process smooth and hassle-free.
Lastly, make sure your car is parked on a flat surface and don’t forget to engage the parking brake. This will prevent any unwanted movement while you’re working, keeping things safe and steady.
Check Engine Temperature
One key step to prepare your car for an oil flush is to check the engine temperature carefully. The right engine temperature guarantees the oil’s viscosity is ideal, making it easier to drain old oil and contaminants.
If the engine is too cold, the oil will be thicker and harder to flush out. If it’s too hot, you risk burns or damage.
Before you start, make sure to:
- Warm up the engine by running it for 5-10 minutes
- Turn off the engine and let it cool slightly (about 10 minutes)
- Verify the engine temperature gauge reads within the normal operating range
- Avoid flushing immediately after long drives to prevent injury
Following these steps helps maintain safety and improves the efficiency of your oil flush.
Gather Necessary Tools
Although flushing your car’s engine oil might seem straightforward, gathering the right tools guarantees you can complete the job safely and efficiently. Start with an oil drain pan to catch old oil, and have the correct wrench or socket set to remove the drain plug and oil filter.
A funnel helps prevent spills when adding fresh oil. Don’t forget gloves and rags to handle hot parts and clean up any mess. If you have access to engine diagnostics tools, use them before and after the flush to monitor your engine’s health and ensure superior fuel efficiency.
Proper tools not only make the process smoother but also help maintain your car’s performance and avoid costly mistakes during the oil flush.
Secure Vehicle Position
Since working underneath your car can be dangerous, you’ll want to secure your vehicle firmly in place. Confirming proper vehicle security and parking safety reduces the risk of accidents while you flush your engine oil.
Start by parking on a flat, stable surface to prevent any rolling. Engage the parking brake fully and place wheel chocks behind the tires for extra stability.
If you have a manual transmission, leave the car in gear; for automatics, keep it in Park. Using jack stands after lifting the vehicle with a jack adds another layer of safety.
Follow these steps to prepare your car confidently:
- Park on a level surface
- Engage the parking brake
- Use wheel chocks on all sides
- Support the car with jack stands if lifted
This confirms a secure, safe workspace.
Drain Old Engine Oil Completely From the Oil Pan
Before you can refill your engine with fresh oil, you’ll need to drain out all the old oil from the oil pan completely. Start by warming up your engine for a few minutes to reduce the engine oil viscosity, making it flow more easily.
Warm your engine briefly to thin the oil, then drain out all the old oil completely before refilling.
Then, securely place a drain pan underneath the oil pan’s drain plug. Use the correct wrench to carefully loosen the drain plug and let the old oil drain out fully. This step ensures no contaminated oil remains to mix with the new oil.
After the oil has drained, replace the drain plug tightly to prevent leaks. Don’t forget to check the oil filter quality. If it’s worn or low-grade, replace it with a high-quality filter to maintain proper oil flow and filtration.
Fully draining the oil and using a good filter helps your engine run smoothly and extends its life. Now you’re ready for the next step in flushing your engine oil.
Add the Oil Flush Chemical to Clear Sludge and Deposits
Choose an oil flush chemical that’s compatible with your engine and good at breaking down sludge and deposits. Make sure to add the chemical exactly as the product instructions say so it works properly. This step really helps clean the internal parts before you pour in fresh oil.
Choosing Effective Oil Flush
When you add an oil flush chemical, you’ll effectively break down sludge and deposits that build up inside your engine. Choosing the right oil flush is vital to protect engine components and maintain oil viscosity.
Look for formulas that complement synthetic blends, as these provide better cleaning without compromising performance. Here’s what to keep in mind:
- Compatibility with your engine’s oil type, especially synthetic blends
- Ability to maintain or improve oil viscosity during the flush
- Effectiveness in dissolving sludge and carbon deposits
- Non-corrosive ingredients to avoid damaging seals and gaskets
Selecting an oil flush designed for your engine’s needs ensures a thorough cleaning and prepares your engine for fresh oil. This helps enhance overall longevity and efficiency.
Proper Chemical Application
Although adding the oil flush chemical might seem straightforward, applying it correctly is essential to effectively break down sludge and deposits inside your engine. First, confirm the chemical compatibility of the flush product with your engine oil to avoid adverse reactions.
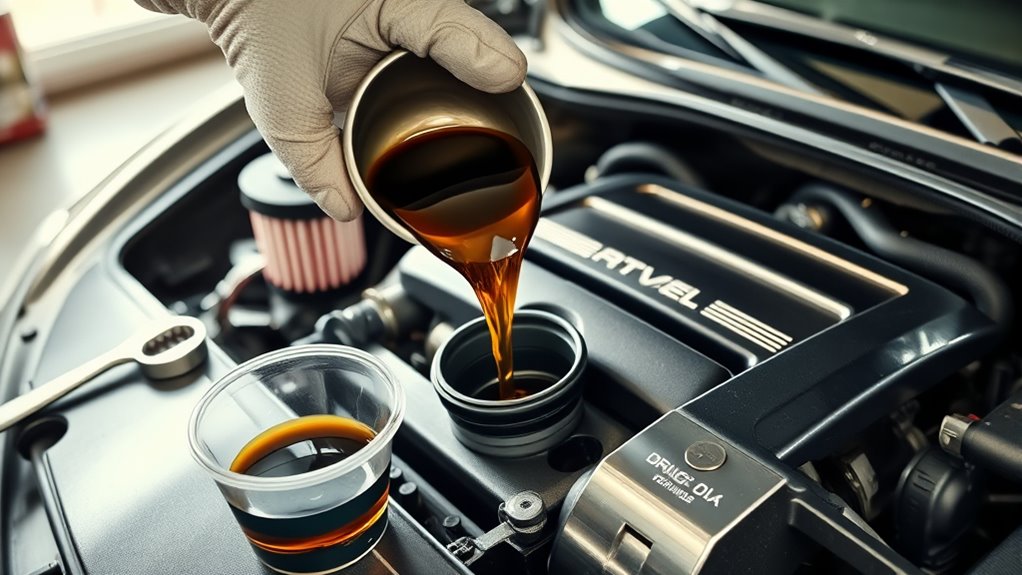
Check the manufacturer’s instructions carefully for the recommended dosage and timing. Pour the flush additive into the engine oil filler after draining the old oil, then add fresh oil as directed. Run the engine at idle for the specified time to let the additive perform at its best, breaking down sludge and deposits without damaging internal components.
Proper chemical application maximizes additive performance, ensuring a thorough clean and better engine function before your next oil change. Don’t skip this step for a successful flush.
Run the Engine to Circulate the Flush Solution
Before you proceed, make certain the flush solution is properly added to your engine oil. Running the engine helps circulate the flush solution, loosening sludge and deposits for effective cleaning. This step is vital for thorough engine maintenance, but you need to follow safety precautions carefully.
Start the engine and let it idle for about 10 to 15 minutes. Avoid revving the engine during this time to prevent strain. Stay near your vehicle to monitor its performance and listen for unusual noises. Keep the garage well-ventilated to avoid inhaling fumes.
Here’s what to keep in mind while running the engine:
- Make sure the engine reaches normal operating temperature.
- Avoid high RPMs to protect engine components.
- Keep a fire extinguisher nearby, just in case.
- Never leave the vehicle unattended during this process.
Drain the Flush Solution and Remaining Contaminants
Once the engine has run long enough to circulate the flush solution, you’ll need to drain it along with any loosened contaminants from the oil pan. Start by placing a suitable container under the drain plug to catch the used flush solution and contaminants.
Carefully remove the drain plug and let all the fluid flow out completely. This step is essential for effective contaminant removal, as it clears out sludge and deposits that the flush solution has loosened.
After draining, replace the drain plug securely to prevent leaks. Remember, the drained fluid contains harmful substances, so take it to a proper oil recycling facility rather than disposing of it improperly. Proper oil recycling helps protect the environment by preventing pollution.
Remove and Replace the Oil Filter After Flushing
After draining the flush solution, you’ll need to remove the old oil filter to guarantee any remaining contaminants don’t circulate in your engine. Proper oil filter replacement is essential for effective engine cleaning and maintaining engine health. Here’s how to do it right:
- Use an oil filter wrench to carefully loosen and remove the old filter.
- Check the old filter’s rubber gasket and ensure it comes off with the filter.
- Lubricate the new filter’s gasket with a bit of fresh oil for a tight seal.
- Screw on the new filter by hand until snug, then tighten it an extra 3/4 turn.
Replacing the oil filter after flushing ensures that dirt and debris trapped in the old filter don’t re-enter your engine. This step completes the engine cleaning process, protecting your engine from wear and boosting performance. Don’t skip this essential step; it’s key to a thorough and effective oil flush.
Refill the Engine With Fresh, High-Quality Engine Oil
Removing the old oil filter and securing a new one sets the stage for replenishing your engine with fresh oil. Before you pour, make sure to choose the right oil viscosity recommended for your vehicle. Using the correct viscosity guarantees proper lubrication under various temperatures and driving conditions, protecting your engine from wear.
Next, consider selecting engine additives designed to improve performance and protect internal components. These additives can optimize viscosity stability, reduce friction, and prevent sludge buildup, extending your engine’s lifespan.
Pour the fresh, high-quality engine oil slowly into the oil filler hole, avoiding spills. Check your owner’s manual for the exact oil capacity to avoid overfilling or underfilling. Using premium oil not only maintains engine efficiency but also supports cleaner combustion and reduces emissions. By carefully refilling with the proper oil and additives, you’re ensuring your engine runs smoothly and reliably until the next oil change.
Check for Leaks and Ensure Proper Oil Levels
Before you close the hood, take a moment to inspect around the oil filter and drain plug for any signs of leaks. Proper leak detection ensures your engine stays protected and prevents oil loss that could damage your car.
Next, focus on oil level monitoring by checking the dipstick to confirm the oil is at the right level. Here’s what you should do:
- Wipe the dipstick clean, reinsert it fully, then pull it out again to read the level accurately.
- Look for fresh oil spots or drips under the car indicating leaks.
- Tighten the oil filter and drain plug if you spot any minor leaks.
- Add oil gradually if the level is low, avoiding overfilling.
Dispose of Old Oil and Materials Safely
Once you’ve confirmed there are no leaks and the oil level is correct, it’s time to handle the old oil and materials responsibly. Improper disposal can harm the environment, so you need to follow local disposal regulations carefully.
Never pour used oil down drains or onto the ground.
Collect the old oil in a clean, leak-proof container and bring it to a recycling center or an auto shop that accepts used oil. Also, dispose of oil filters and rags properly since they can contain hazardous residues.
| Material | Disposal Method |
|---|---|
| Used Oil | Recycling center or auto shop |
| Oil Filters | Hazardous waste collection |
| Oil-soaked Rags | Hazardous waste collection |
| Containers | Recycle or dispose properly |
| Plastic Funnels | Clean and reuse or recycle |
Frequently Asked Questions
How Often Should I Flush My Engine Oil?
You should flush your engine oil every 30,000 to 50,000 miles, depending on your vehicle and driving habits. If your car uses engine oil additives, they can sometimes extend oil change intervals, but don’t rely on them alone.
Always check your owner’s manual for specific recommendations. Regular flushing helps remove sludge and contaminants, keeping your engine running smoothly. Don’t skip oil change intervals to protect your engine’s longevity.
Can Flushing Damage My Engine?
Flushing your engine is like giving it a deep clean, but if done wrong, it can stir up sludge like a storm. You shouldn’t worry about engine damage if you use the right flush fluid and follow instructions carefully.
Proper flushing removes oil contaminants, helping protect your engine’s lifespan. However, overdoing it or using harsh chemicals might harm seals or dislodge debris, so always stick to recommended guidelines to keep your engine safe.
Is Oil Flushing Necessary for High-Mileage Cars?
Yes, oil flushing can be necessary for high-mileage cars, especially if you’re switching to synthetic oil or using oil additives. These products can loosen sludge and deposits, so flushing helps remove contaminants before fresh oil goes in.
It guarantees your engine stays clean and runs smoothly longer. Just make sure you use the right flush and follow your car’s maintenance schedule to avoid any potential issues.
What Are the Signs My Engine Needs an Oil Flush?
If your engine feels like a clogged river, struggling to flow smoothly, it’s a sign you might need an oil flush. You’ll notice engine sludge building up, thick and dark, slowing down performance.
Oil contaminants can cause rough idling, strange noises, or overheating. If your oil looks gritty or your car’s losing power, don’t wait. Flushing that sludge out can restore your engine’s life and keep it running clean.
Can I Flush Engine Oil Myself or Should a Mechanic Do It?
You can flush engine oil yourself if you’re comfortable with basic car maintenance, but be careful to avoid oil contamination by using the right products and procedures.
Engine cleaning requires precision. If you’re unsure or lack proper tools, it’s best to let a mechanic handle it. They have the expertise to prevent damage and guarantee thorough cleaning.
Conclusion
Flushing your car’s engine oil is like giving your engine a fresh breath of life, much like a river clearing away the debris after a storm. By following these simple steps, you’re ensuring your engine runs smoothly and stays healthy for miles ahead.
Just as a gardener tends to their plants, your care will keep your car thriving. So, roll up your sleeves and let your engine feel the renewal it deserves. Flushing your car engine oil is a great way to maintain its performance and longevity.