Top 10 Power Tools for Woodworking in 2027
Many woodworkers struggle to choose the right tools without overspending or filling their workshop with equipment they rarely use. You’re not alone. The best power tools for woodworking in 2027 can help you work more efficiently, make cleaner cuts, and take on projects with greater confidence.
The top 10 power tools for woodworking in 2027 include a cordless drill, router, circular saw, track saw, jobsite table saw, miter saw, jigsaw, random orbital sander, planer, and dust extractor. You’ll use them to drill, shape, cut, smooth, size, and safely manage wood dust.
Choose brushless motors, carbide-tipped blades, variable-speed controls, secure fences, and effective dust collection. With proper setup, maintenance, and safety gear, you’ll work faster and achieve cleaner results.
The details below can help you choose wisely.
Key Takeaways
- Cordless drills offer versatile fastening and drilling with brushless motors, adjustable clutches, two-speed gearboxes, and 12V or 18V/20V power options.
- Circular saws, track saws, and jobsite table saws deliver efficient straight cuts, accurate panels, and repeatable sizing.
- Miter saws provide precise crosscuts and angled cuts when paired with suitable blades, secure fences, and proper stock support.
- Routers and jigsaws handle edge profiles, joinery, curves, and interior cutouts using appropriate bits, blades, guides, and controlled passes.
- Random orbital sanders, planers, and dust extractors improve surface quality, thickness consistency, air quality, and workshop safety.
Best Cordless Drill for Woodworking
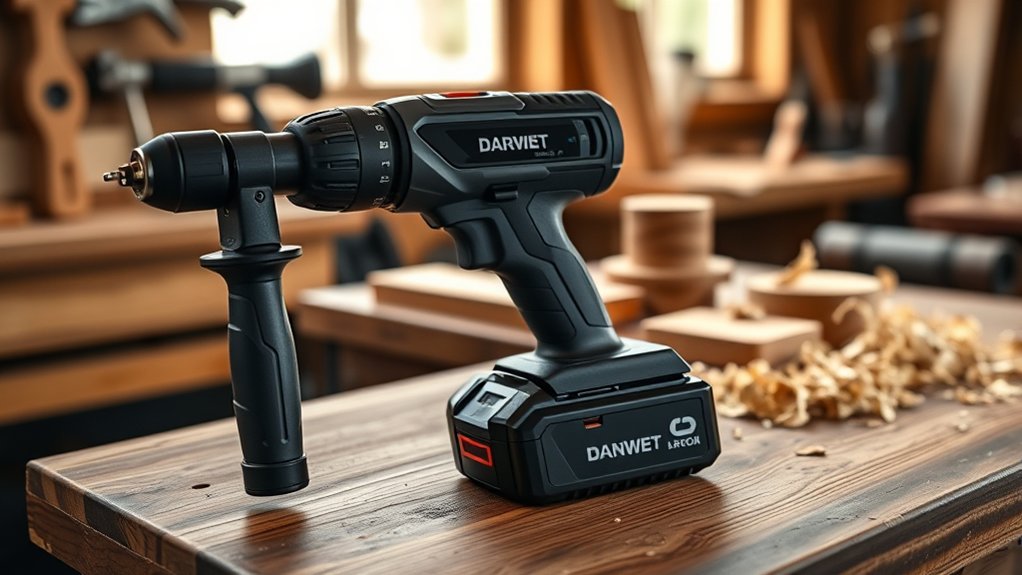
When choosing the best cordless drill for woodworking, prioritize precise speed control, a comfortable grip, and a clutch with multiple settings. You’ll handle delicate pilot holes and larger boring tasks more confidently when the motor responds smoothly to trigger pressure. Choose a brushless model for longer runtime, cooler operation, and stronger performance under load.
Look for cordless drills with a compact design, balanced weight, and a keyless chuck that holds bits securely. A 12V drill suits cabinetry, trim, and light assembly, while an 18V or 20V model gives you extra power for hardwood and thicker stock.
Pay attention to useful drill features, including an adjustable clutch, two-speed gearbox, LED work light, battery gauge, and belt hook. Select batteries that fit other tools in your workshop to reduce cost and clutter.
Before buying, test the grip and controls. You’ll work more accurately when the drill feels stable, comfortable, and easy to adjust.
Random Orbital Sander for Smooth Wood Finishes

After drilling and assembling your project, a random orbital sander helps create a smooth, even surface without leaving the obvious swirl marks common with standard orbital sanders. Choose a model with variable speed, comfortable handling, and reliable dust collection to work efficiently and protect your lungs.
Start with coarse sanding grit options to level rough areas, then progress through medium and fine grits for a refined surface. Keep the pad flat, apply light pressure, and move steadily across the wood; excessive force can create uneven patches or slow the motor.
Empty the dust canister regularly, and use a shop vacuum when possible. Before applying stain, paint, or clear coat, inspect the surface under bright, angled light and remove dust with a tack cloth.
Experiment with wood finish techniques on scrap material first, because different species absorb products differently. Replace worn discs promptly to maintain consistent results and prevent accidental scratches.
Circular Saw for Fast, Straight Cuts
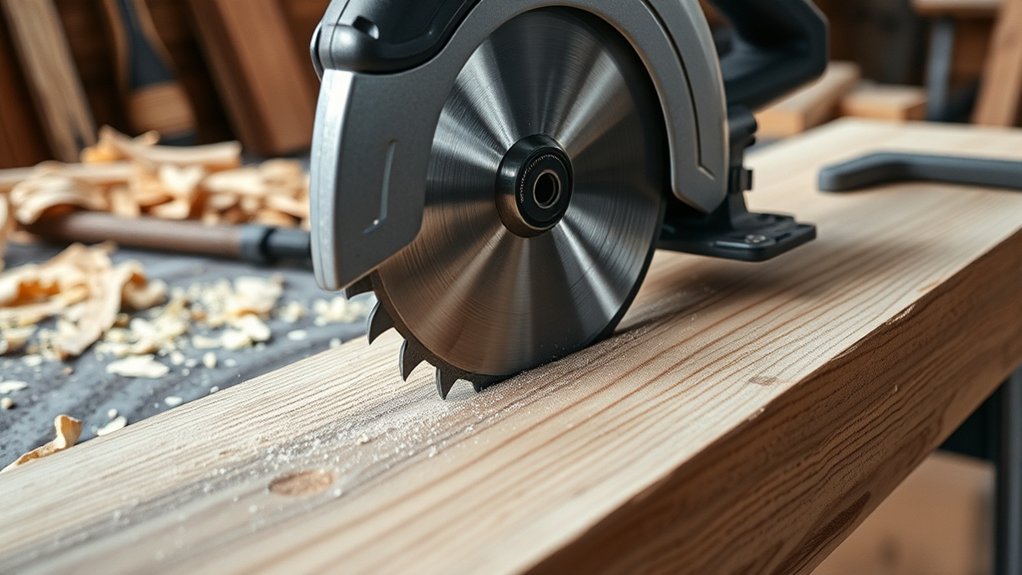
A circular saw helps you make fast, straight cuts when you use the right blade for your material. Match the tooth count and blade type to your project for cleaner results. For straighter cuts, use a guide, apply steady pressure, and keep the saw properly aligned.
Blade Selection Tips
Choose a blade based on the material and finish you need, not just the saw’s size. For rough framing cuts, choose a 24-tooth carbide-tipped blade that removes material quickly.
For plywood, melamine, or hardwood, use a 40-to-80-tooth blade to reduce splintering and leave a cleaner edge. Match the blade’s kerf to your saw’s power and the job.
A thin-kerf model wastes less material and works well with compact saws. Check the arbor diameter and maximum RPM before installation.
Blade material also affects durability. Carbide tips stay sharp longer than high-speed steel and handle demanding cuts better.
Keep resin and pitch off the teeth, and inspect for damage regularly. Blade sharpening can restore performance, but replace blades with cracked bodies, missing teeth, or excessive wear.
Store each blade safely to protect its teeth.
Straight Cutting Techniques
How can you make fast, straight cuts with a circular saw? Start by marking your line clearly on the workpiece, then support both sides to prevent binding. Set the blade depth just below the material, and check the cut angle before powering on.
Keep the saw’s base plate flush against the surface as you guide it steadily along a straightedge or clamped guide. Don’t force the tool; let the blade maintain its speed while you watch the line ahead.
Consider grain orientation, especially when cutting hardwood, because following or crossing the grain can affect control and tear-out. Use a sharp blade suited to your material, wear eye and hearing protection, and keep both hands on the saw.
Release the trigger only after the blade clears the workpiece.
Track Saw for Cleaner Panel Cuts
Need cleaner panel cuts without wrestling a full-size table saw? A track saw gives you portable, controlled accuracy for breaking down plywood, MDF, and solid-wood panels. You’ll guide the saw along a straightedge track, so the blade stays aligned while you cut.
A track saw delivers portable, controlled accuracy for cleaner panel cuts without the bulk of a full-size table saw.
This setup reduces wandering, splintering, and awkward handling, especially when you’re working alone.
Choose a model with a plunge mechanism, variable speed, and a reliable bevel adjustment. A dust port connected to a vacuum will keep your layout visible and improve air quality.
Use a fine-tooth blade for finished faces, and place the panel on sacrificial foam to support the cut without damaging your floor.
Before cutting, mark your line, position the track, and account for the blade’s offset. Clamp the track when necessary, then let the saw’s weight and sharp blade do the work.
With practice, you’ll produce cleaner panel cuts quickly and confidently.
Jobsite Table Saw for Accurate Repeat Cuts
When you need consistent crosscuts, rips, and repeated parts on site, a jobsite table saw gives you a stable, guided cutting platform without the bulk of a cabinet saw. Choose a model with a rigid fence, smooth adjustment, and a dependable locking mechanism.
These features help you maintain a fixed measurement while processing multiple boards.
For accurate repeat cuts, mark your target dimension on a setup block or use a stop attached to an auxiliary fence. Keep the stop clear of the blade’s offcut side so pieces don’t bind between the blade and fence.
A wide, level table or outfeed support also keeps long stock stable as you cut.
Before starting, verify the blade aligns with the miter slot and fence. Use a sharp combination blade, secure the workpiece against the fence, and let the saw reach full speed.
You’ll work faster and safer when you measure once, set the fence carefully, and repeat each cut consistently.
Router for Clean Edges and Joinery
A router lets you shape clean edges, cut profiles, and create precise joinery with interchangeable bits. Choose a compact trim router for light Edge finishing, or use a plunge router when you need controlled depth changes.
Install a sharp bit, secure your workpiece, and move the tool steadily against its rotation to prevent sudden grabs. Begin with shallow passes, especially when removing substantial material, and let the bit do the cutting rather than forcing it.
Use a straight bit for grooves, dadoes, and mortises, then switch to a round-over or chamfer bit to soften exposed edges. Template guides help you duplicate shapes, while a fence keeps cuts straight and consistent.
Your Joinery techniques can include rabbets, dovetails, mortises, and tenons, depending on your bits and setup. Wear eye and hearing protection, manage the cord, and test every setting on scrap wood before routing your finished project.
Clean the base and collet regularly to maintain accuracy and control.
Miter Saw for Precise Crosscuts
You’ll get accurate angled cuts with a miter saw by aligning the fence, setting the bevel, and securing each board. Choose a blade with the right tooth count for your material and the finish you want.
With these settings in place, you’ll be ready to make more precise crosscuts for your 2027 woodworking projects.
Accurate Angled Cuts
For accurate angled cuts, a miter saw gives you fast, repeatable crosscuts with clean, consistent results. Before cutting, secure your workpiece against the fence and mark the waste side clearly.
Use the saw’s angle scale for quick settings, then confirm the angle measurement with a reliable square or digital gauge. Lock the table firmly so it won’t shift during the cut.
For compound projects, make precise bevel adjustments and test the setup on scrap wood first. Keep your hands outside the marked safety zone, lower the head smoothly, and let the blade stop before lifting it.
Support long boards on both sides to prevent movement or pinching. With careful setup, you’ll produce accurate frames, trim joints, and crosscut assemblies while reducing rework and material waste.
Check every joint before final assembly.
Blade Selection Tips
Choosing the right blade helps your miter saw produce cleaner, more accurate crosscuts. Select a blade based on your material and finish requirements. A 40-tooth combination blade handles general construction lumber, while a 60- or 80-tooth blade creates smoother cuts in hardwood, plywood, and trim. Choose a thin-kerf blade if you want less waste and faster cutting, but confirm that it suits your saw’s power and arbor size.
Prioritize blade durability when you cut dense stock or work frequently. Carbide-tipped teeth typically last longer and resist heat, yet you should keep the blade clean and properly tensioned. Watch for burning, chipping, or increased effort; these signs may indicate dull teeth. Schedule blade sharpening when appropriate, or replace severely damaged blades. Always unplug the saw before changing blades and match its speed rating.
Jigsaw for Curves and Cutouts
When your woodworking project calls for curved lines, interior cutouts, or tight corners, a jigsaw gives you the control a circular saw can’t. You can guide its narrow blade through plywood, hardwood, and laminates, creating flowing shapes that other saws struggle to follow.
Choose a fine-tooth blade for clean cuts, and let the tool move steadily without forcing it around bends.
For interior openings, drill a starter hole large enough for the blade, then insert it while the saw is off. Clamp your workpiece securely, and keep both hands clear of the cutting path.
Follow essential jigsaw safety tips, including wearing eye protection and waiting for the blade to stop before setting the tool down.
A variable-speed trigger helps you manage delicate curves, while an orbital setting can speed up straight sections.
Explore creative jigsaw designs such as templates, scrollwork, and custom inlays. Mark your cut line clearly, and support waste material to prevent splintering or binding.
Planer for Consistent Board Thickness
A planer gives you precise thickness control, helping you create consistently sized boards. It also produces smooth, even surfaces that require less sanding. When choosing a model in 2027, look for accurate settings and reliable feed performance.
Precision Thickness Control
A thickness planer gives you consistent board thickness by shaving each face to a preset dimension, making it easier to create flat, uniform parts for furniture and joinery.
Set your target with digital calibration, then verify the result using a thickness gauge. Take light passes, especially when reducing thick stock, and measure after each pass to prevent overshooting.
A clear scale, solid depth stop, and repeatable adjustment help you prepare matching components quickly. Use this workflow to keep rails, stiles, shelves, and panels within tight dimensional limits.
| Planer feature | Workshop benefit |
|---|---|
| Digital calibration | Accurate settings |
| Thickness gauge | Quick verification |
| Depth stop | Repeatable cuts |
| Light passes | Controlled reduction |
Mark each board’s target dimension before feeding it, and sort pieces by thickness. You’ll spend less time correcting mismatched parts and more time assembling precise projects.
Always support long boards to maintain steady feeding and consistent results.
Smooth, Even Surfaces
Sharp knives and steady feed pressure help your planer leave boards with smooth, even surfaces from end to end. Set the cutting depth conservatively, especially when you’re working with figured or wide stock.
Feed each board at a consistent pace, and support both ends to prevent snipe. Check the grain alignment before planing; running against changing grain can cause tear-out and leave ridges that complicate surface finishing.
A sharp, properly adjusted planer produces a uniform texture, reducing sanding time and preserving more usable thickness. Inspect the first pass, then make minor adjustments rather than removing too much material at once.
Keep your knives clean and replace them when they dull. With steady technique and accurate thickness settings, you’ll create boards that feel smooth, fit reliably, and accept finishes evenly.
Dust Extractor for Safer Woodworking
When you cut, sand, or route wood, a dust extractor captures fine particles at the source before they spread through your workshop. This powerful upgrade improves air quality, protects your lungs, and keeps your workspace cleaner.
> Capture fine wood dust at the source to improve air quality, protect your lungs, and keep your workshop cleaner.
Choose a model with enough airflow for your tools, then connect it securely to each machine’s dust port. A HEPA-rated filter can trap especially fine particles, while a sealed canister helps prevent leaks during emptying.
Effective dust collection also protects your finishes and reduces cleanup time. You’ll work more comfortably when you can see your cut line clearly instead of through a cloud of sawdust.
Match the extractor’s hose diameter to your equipment, and check filters regularly to maintain strong suction.
Wear a properly fitted respirator, eye protection, and hearing protection as essential safety precautions. Never sweep airborne dust into the room; use a vacuum or damp cleanup method.
Before maintenance, disconnect power and empty the container safely.
Frequently Asked Questions
How Should Woodworking Power Tools Be Maintained for Maximum Lifespan?
Maintain your woodworking power tools by cleaning them after every project, removing sawdust from vents, switches, and moving parts. Inspect cords, batteries, guards, and fasteners regularly, and replace damaged components immediately.
Follow the manufacturer’s schedule for tool lubrication, applying only the recommended lubricant. Keep blades clean, dry, and properly aligned. Schedule blade sharpening whenever cuts become rough or require extra force.
Store each tool in a dry, protected area, away from moisture and extreme temperatures.
What Safety Equipment Is Essential When Operating Woodworking Power Tools?
You protect more than your body; you protect every project your hands create. Essential personal protective equipment includes safety glasses or a face shield, hearing protection, a properly fitted dust mask or respirator, sturdy closed-toe shoes, and snug clothing without loose parts. Keep hair secured.
Use push sticks and guards when appropriate. Complete safety training before operating equipment, understand each tool’s manual, and stay alert around blades, dust, and noise.
How Much Electricity Do Modern Woodworking Power Tools Typically Consume?
Modern woodworking power tools typically consume 500–2,000 watts while running, depending on their motor and task. You’ll find compact sanders and drills near 500–800 watts, while table saws, planers, and routers often use 1,200–2,000 watts.
Voltage requirements usually include 120 volts in North America or 230 volts elsewhere. Actual electricity use depends on runtime, so energy efficiency improves when you choose efficient motors, avoid unnecessary idling, and maintain sharp, clean components.
Can Beginners Safely Use Professional-Grade Woodworking Power Tools?
Yes, you can safely use professional-grade woodworking power tools as a beginner, but you’ll need patience, training, and strict habits. Prioritize Beginner safety by reading manuals, wearing eye and hearing protection, securing workpieces, and keeping hands away from blades.
Build tool familiarity with simpler projects and supervised practice before attempting advanced cuts. Start slowly, inspect equipment, and never bypass guards or safety switches. If you feel uncertain, stop and ask an experienced woodworker.
What Warranty Coverage Should Buyers Expect From Leading Tool Brands?
You should expect a warranty to serve as a sturdy safety net: leading brands typically cover manufacturing defects for one to five years, while premium products may include extended or limited lifetime protection.
Warranty policies often exclude normal wear, misuse, batteries, and commercial use, so read the fine print before buying.
Brand reliability matters, too; responsive service, accessible parts, and straightforward claims can make coverage genuinely valuable when your tool fails.
Conclusion
Choosing the right power tools can transform your woodworking, whether you’re building furniture or tackling weekend repairs. A cordless drill, sander, saw, planer, and dust extractor will help you work faster, cleaner, and more safely.
You don’t need every tool at once. Start with what matches your projects, then expand your workshop as your skills grow.
Even in 2027, remember this timeless truth: measure twice, cut once, and let quality guide every project you make. With the right power tools for woodworking, you can create with greater confidence and precision.