
How to Use a Drill in 10 Easy Steps
Choosing the right drill can feel overwhelming, especially when you need clean, accurate results without damaging your materials. You’re not alone—many people struggle with choosing the right settings, bits, and techniques.
This simple guide to how to use a drill will help you work more confidently and safely.
Choose the right drill and bit for your material, then wear safety glasses and clear your workspace. Check the battery, cord, and power source.
Secure the bit in the chuck and clamp your workpiece. Set speed, direction, and clutch.
Mark your hole, hold the drill straight, and start slowly. Apply steady pressure and control depth.
For screws, use a driver bit and low speed. Release the trigger, remove the bit, clean the drill, and store it safely.
More helpful tips follow.
Key Takeaways
- Choose the correct drill and bit for your material, then inspect the tool, battery, cord, chuck, and bit for damage.
- Wear safety glasses and appropriate protective gear, clear the workspace, and secure the workpiece with clamps or a vice.
- Insert and tighten the bit securely. Set the correct speed, rotation direction, clutch, and depth stop before drilling.
- Mark the drilling point, hold the drill perpendicular, start slowly, and apply steady pressure without forcing the tool.
- Release the trigger to stop, remove the bit safely, clean dust from the drill and vents, and store everything properly.
Choose the Right Drill and Bit
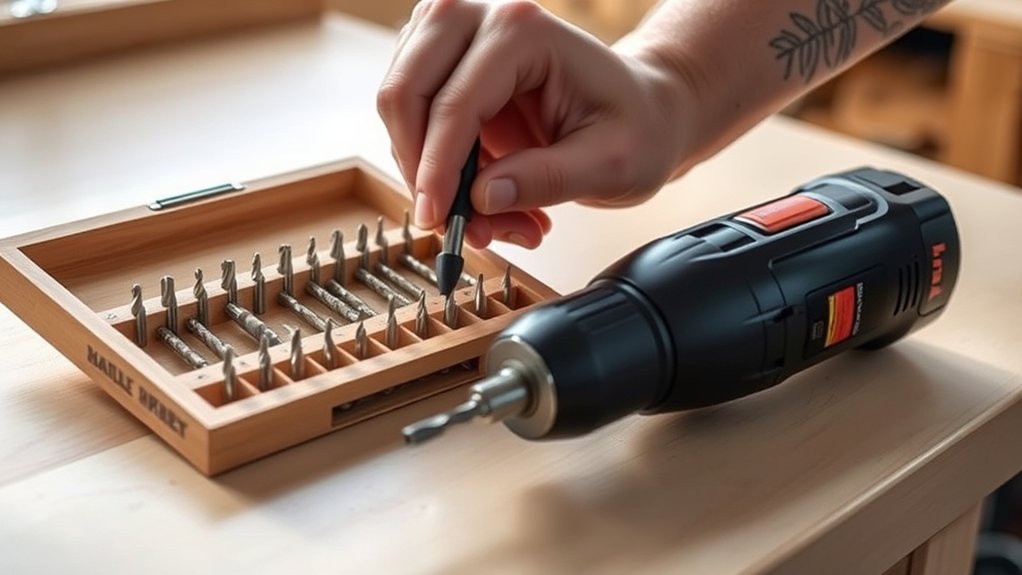
Choosing the right drill and bit starts with matching the tool to the job. For small household tasks, choose a cordless drill with adjustable speed and clutch settings. Its portability helps you work efficiently, while sufficient voltage provides the torque you need.
Match your drill’s power, speed, and clutch settings to the task for efficient, controlled household projects.
For masonry, select a hammer drill and a masonry bit. Use a drill press when you need consistent, precise holes in rigid materials.
Match the bit to both the material and hole size. Twist bits suit wood and metal, spade bits create wider holes in wood, and masonry bits handle brick or concrete. For screws, use the correct driver bit to prevent slipping and damaged heads.
Consider drill ergonomics before buying. A balanced, lightweight handle reduces fatigue and improves control. Check the chuck’s capacity, battery runtime, and charging time.
Good battery maintenance, including proper storage and regular charging, keeps a cordless drill ready for your next project. Avoid forcing any bit, and replace dull ones promptly.
Put on Safety Gear and Clear Space

Before you start drilling, put on safety glasses to protect your eyes from flying debris. Add protective gear that matches the task: hearing protection for loud work, a dust mask for particles, and snug gloves when appropriate.
Avoid loose clothing, jewelry, and anything that could catch in the drill. Tie back long hair and wear closed-toe, nonslip shoes.
Clear your area before you position the drill. Remove clutter, secure rugs, and keep cords, tools, and materials out of your path.
Good workspace organization helps you move safely and spot hazards quickly. Illuminate the surface, and keep children and pets away.
Clamp or otherwise secure the material so it won’t shift while you work.
| Safety item | Purpose | Quick check |
|---|---|---|
| Safety glasses | Block flying debris | Fit snugly |
| Dust mask | Reduce inhaled dust | Seal comfortably |
Inspect the space once more, then maintain a balanced stance with both feet firmly planted. Don’t begin until your work area and protective gear are ready.
Check the Battery and Power
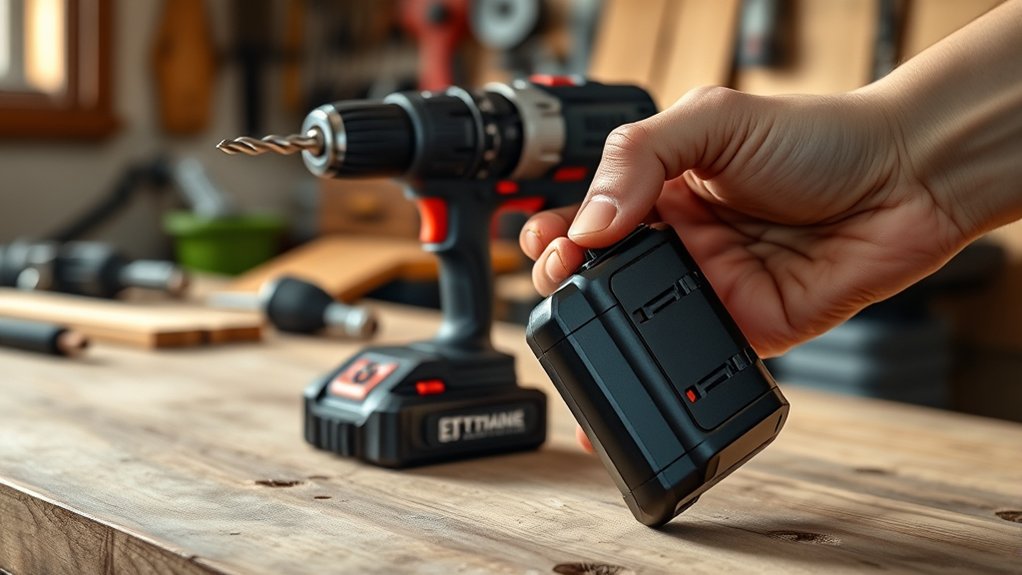
Check that the drill’s battery is fully charged and clicks securely into place, or confirm that the power cord and outlet are in good condition. Inspect the battery for cracks, leaks, swelling, or loose contacts. Don’t use a damaged battery, frayed cord, bent plug, or cracked housing.
> Verify the battery, cord, and housing are undamaged and securely connected before operating the drill.
For battery maintenance, store packs in a cool, dry place and recharge them with the manufacturer’s approved charger. Let a hot battery cool before charging, and remove it from the charger when appropriate for your model.
Practice power source safety by keeping cords away from water, sharp edges, heat, and moving tools. Plug corded drills into a properly grounded outlet, and don’t use an adapter that defeats grounding.
If you’re working outdoors or in a damp area, use a ground-fault circuit interrupter (GFCI). Keep the switch off before connecting power or inserting a battery.
Test the trigger briefly only after you’ve confirmed the drill’s power supply is stable and your workspace remains clear.
Secure the Bit in the Chuck
Select a bit that matches the material and task, then open the chuck by turning its sleeve counterclockwise or using the chuck key, depending on your drill. Insert the bit’s smooth shank into the chuck, leaving enough length exposed for the job.
Check bit alignment by viewing it from the side and correcting any tilt before tightening.
Hold the bit steady while you turn the sleeve clockwise. If your drill uses a chuck key, tighten each hole evenly, then remove the key.
Firm chuck tightening keeps the bit from slipping or wobbling, helping you work safely and accurately. Never start with a damaged, bent, or dull bit.
| Check | Why it matters | Your result |
|---|---|---|
| Shank seated | Prevents slipping | Steadier drilling |
| Bit alignment | Reduces wobble | Cleaner holes |
| Chuck tightening | Holds securely | Greater confidence |
Give the bit a gentle pull to confirm it’s locked. Keep fingers clear of the chuck and bit’s cutting edges.
Set Speed, Direction, and Clutch
Set the drill’s speed, rotation direction, and clutch before you start. Use the speed control to match the tool to your task. Choose a low setting for driving screws or drilling into hard materials, and select a higher setting for small bits and softer materials. Squeeze the trigger gradually so you can maintain steady control instead of starting at full speed.
Check the direction switch before you apply power. Set it to forward for drilling and driving, then use reverse to remove screws or back out a stuck bit. Keep your finger off the trigger during this direction adjustment to prevent accidental movement.
Set the clutch to a low number when driving screws into delicate surfaces. Increase the setting when the drill stops too easily. Use the drill symbol, if available, when you need maximum torque for drilling. Test your settings briefly, and adjust them if the tool strains, slips, or drives too deeply.
Mark and Secure the Material
Mark the drilling point clearly with a pencil, awl, or center punch so the bit won’t wander. For accurate material marking, measure from two edges, then double-check the location before you make an indentation.
Use a square for straight layouts and painter’s tape to highlight marks on dark or glossy surfaces.
Choose securing techniques that match the material and project. Clamp wood, plastic, or metal firmly to a stable workbench.
Add scrap wood beneath thin stock to reduce splintering and protect your bench. Keep your hands away from the marked area, and remove loose clothing or jewelry.
For small pieces, place them in a vise or secure them with clamps; never hold them in your hand.
| Material | Marking aid | Secure with |
|---|---|---|
| Wood | Pencil or awl | Bar clamp |
| Metal | Center punch | Vise |
| Tile | Wax pencil | Padding and clamp |
Check that the workpiece can’t shift before continuing. Keep the surface clear, level, and well supported.
Start Drilling Slowly and Steadily
Start at a low speed so you can control the drill as the bit enters the material. Apply steady pressure without forcing it, and keep the drill aligned with your mark.
Begin at Low Speed
Begin drilling at a low speed so the bit can bite into the material without slipping or overheating. Set your drill’s speed control to its lowest setting, especially when working with metal, tile, or hardwood.
Place the bit’s tip exactly where you marked the hole, then squeeze the trigger gently. Listen to the motor and watch the bit as it starts cutting.
Increase the speed gradually only when the bit has created a stable path. Lower speeds give you better control, reduce heat, and help prevent wandering or damaging the surface.
Use good drill ergonomics by holding the tool with both hands, keeping your wrists straight, and positioning your body comfortably.
If the bit begins to chatter or bind, release the trigger, let it stop, and reassess your setup.
Maintain Steady Pressure
Once the bit is turning slowly, apply firm, even pressure straight into the material. Let the drill do the work instead of forcing it forward.
Use pressure control to maintain a smooth, consistent feed as the bit cuts. If you push too hard, the motor may strain, the bit can overheat, or the material could crack.
If you press too lightly, the bit may skid or wander across the surface. Keep both hands on the drill when possible, and maintain grip stability without squeezing until your hands tire.
Listen to the motor and watch the cutting action. If the sound changes sharply, ease off briefly and let the bit recover.
Continue at a steady pace, adding pressure gradually only when the material requires more cutting force.
Keep the Drill Aligned
Keep the drill perpendicular to the surface as you slowly squeeze the trigger. Start at low speed so you can control the tool and confirm the bit alignment.
Watch the bit’s entry point, and keep your wrist straight while applying even pressure. Don’t force the drill; let the bit cut at its own pace.
If it begins to wander, release the trigger, pull it back slightly, and reposition it before continuing.
For accurate results, check your drill calibration and ensure the chuck holds the bit firmly. A loose or bent bit can create an angled hole, damage the material, or strain the motor.
As the hole deepens, maintain your original angle and steady speed. Keep both hands on the drill when possible, and stop occasionally to clear debris safely.
Control Drilling Depth for Clean Holes
Set the desired depth before drilling so you don’t drive the bit too far. Use a depth stop if your drill has one. Slide the stop along the bit, tighten it at the target measurement, and test the setting on scrap material.
If you don’t have a stop, wrap electrical tape around the bit to mark how far it should enter. Measure from the bit’s tip, not the chuck, and account for the material’s thickness.
Hold the drill square to the surface as you begin. Apply steady pressure, but don’t force the bit past your mark. Slow down as you approach the target to improve drilling accuracy and prevent the bit from punching through.
Clear chips periodically so they don’t interfere with depth control or create excess heat. For clean holes, support the workpiece securely and place scrap wood beneath it when drilling through.
Release the trigger before withdrawing the bit, keeping it straight to reduce splintering.
Set the Drill for Driving Screws
Choose a low speed and moderate clutch setting before driving screws. This balance gives you control and helps prevent stripped heads, split wood, and overdriving. Install a driver bit that matches the screw head, then tighten the chuck securely. Set the drill to forward and hold it straight against the screw.
- Start gently, applying steady pressure until the threads catch.
- Increase pressure gradually, but don’t force the screw if it stops.
- Raise the clutch setting slightly for dense material or longer screws.
Keep your wrist aligned with the drill, and let the tool’s torque do the work. Test the setting on scrap material first, especially when working with delicate wood, drywall, or finished surfaces.
For consistent results, use the same speed and clutch approach throughout the project. Good drill maintenance, including checking the chuck and battery condition before use, supports reliable screw driving.
Afterward, follow your drill storage routine so the tool and bits stay protected and ready for your next task.
Remove the Bit and Clean Up
Once you’ve finished driving the screws, unplug the drill and remove the bit. Wipe the drill and bit clean, then clear away any dust and debris from your work area. Store everything safely so it’s ready for your next project.
Remove the Drill Bit
When you’ve finished drilling, release the trigger and wait for the bit to stop completely. Unplug the drill or remove its battery before handling the chuck. Hold the bit with a cloth or work glove, then loosen the chuck by turning it counterclockwise. For a keyless chuck, twist the sleeve by hand; for a keyed chuck, use the chuck key and remove it immediately afterward.
- Pull the bit straight out without forcing it.
- Check the bit for chips, bending, or excessive wear.
- Set the bit aside for Bit maintenance before returning it to its case.
If the bit feels stuck, don’t yank it. Tighten and loosen the chuck once more, then try again. Keep bits organized by size so you can find replacements quickly. Proper drill storage protects both the tool and its accessories.
Clean the Drill and Area
With the bit removed and the drill unplugged, wipe dust and debris from the chuck, housing, and vents using a dry cloth. Don’t use water or spray cleaner, which could damage internal components. If grime sticks, slightly dampen the cloth, then dry the drill completely.
Brush dust from the chuck’s jaws and inspect the cord, battery, and trigger for damage. Never use a damaged drill; arrange repairs or replacement before your next project.
Clean your work area by sweeping up shavings, collecting screws, and removing scraps that could cause trips or damage. These simple maintenance tips keep your tool ready and help you spot problems early.
For storage solutions, place the drill, bits, charger, and accessories in a case or drawer away from moisture and extreme temperatures. Coil the cord loosely, or remove the battery if you won’t use the drill soon.
Frequently Asked Questions
How Do I Choose Between a Cordless and Corded Drill?
Choose a cordless drill if you value portability, quick setup, and working away from outlets. Compare battery types: lithium-ion packs stay lighter, hold charges longer, and recharge faster than older nickel-cadmium batteries.
Choose a corded drill if you need continuous power, stronger performance for demanding tasks, or a lower upfront cost. Consider your power sources, project duration, material, and access to electricity before deciding.
For occasional home repairs, a cordless drill usually wins.
How Often Should I Maintain or Lubricate My Drill?
You should inspect your drill before every use and perform thorough maintenance monthly, or sooner with heavy use. Follow a maintenance checklist: clean vents, check the cord or battery, tighten the chuck, inspect bits, and examine switches for damage.
Lubricate moving parts only as your manual recommends, usually every few months. Don’t oil electrical components.
For drill safety, unplug corded models and remove batteries before cleaning, inspecting, or lubricating.
Can I Use a Drill for Mixing Paint or Other Materials?
Yes, you can use a drill for Paint mixing and Material blending if you choose the right attachment. Install a mixing paddle in your drill’s chuck, then start at the lowest speed to prevent splashing.
Gradually increase speed as needed, keeping the paddle submerged. Use a powerful, variable-speed drill for thick compounds.
Don’t mix flammable materials, and clean the paddle and chuck promptly after use to prevent buildup or damage.
What Should I Do if My Drill Overheats During Use?
Don’t keep working just because the drill still runs; overheating can damage its motor and create a safety risk. Release the trigger, unplug the drill, and let it cool completely.
Remove the bit and check for clogged vents, excessive pressure, or a dull accessory. Use short bursts and lighter pressure after restarting.
Overheating prevention includes clean vents and proper bits. Cooling methods include air-drying and placing the tool in shade, never water.
How Do I Store a Drill Safely for Long-Term Use?
Store your drill in a clean, dry place away from moisture, heat, and direct sunlight. Remove the battery or unplug the cord before storage, then inspect the tool, cord, chuck, and bits for damage.
Clean away dust and debris, and lightly lubricate moving parts if the manufacturer recommends it. For storage safety, secure loose accessories separately.
Follow long-term maintenance guidance, and recharge batteries periodically to preserve their capacity.
Conclusion
With these steps, you’re ready to use a drill safely and confidently. Choose the right bit, protect yourself, and work steadily rather than rushing.
Adjust the settings for each task, control your depth, and keep a firm grip for clean results. When you’re finished, remove the bit, unplug or switch off the drill, and clean your workspace.
Follow this routine every time, and you’ll handle nearly any small project with the power of a thousand professionals. With these tips on how to use a drill, you’ll be ready to take on your next project safely.