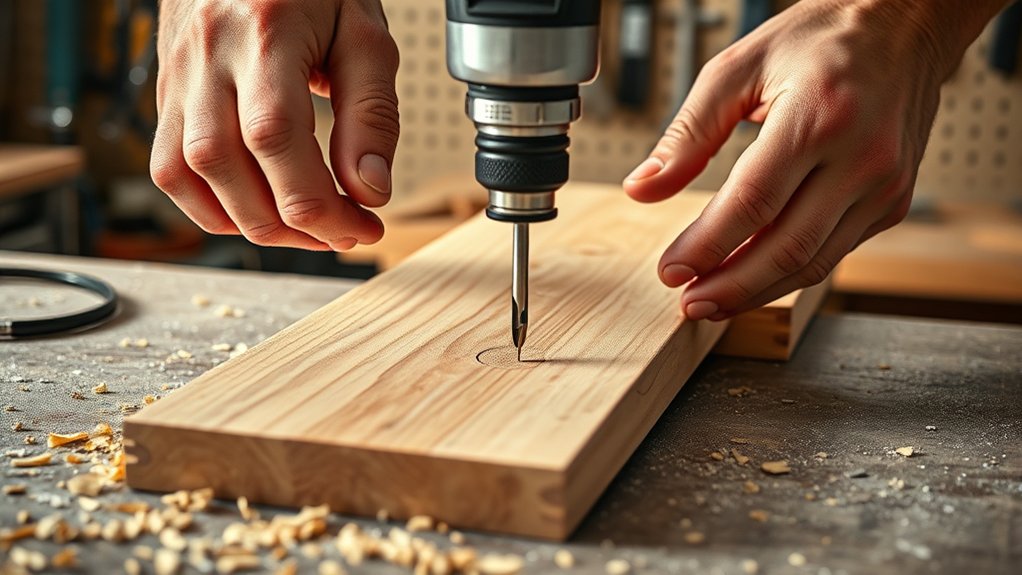
How to Use an Electric Drill in 10 Easy Steps
Choosing the right electric drill can feel overwhelming, especially when you need reliable power, control, and safety for your project. You’re not alone—many people struggle to know which drill and bit to use or how to operate them confidently.
This guide breaks down how to use an electric drill in 10 easy steps.
To use an electric drill, choose the right drill and bit, then put on safety glasses. Secure the bit in the chuck and check that it spins straight. Mark and clamp your workpiece, select the proper speed and forward rotation, and start slowly.
Hold the drill with both hands, keeping it straight. Clear debris, avoid overheating, and use a clutch for screws.
Unplug or remove the battery, clean the tool, and store it safely. Follow the steps below for more guidance.
Key Takeaways
- Choose the correct drill, bit, speed, and rotation direction for your material and task.
- Wear safety glasses, secure loose clothing, and clamp the workpiece firmly on a stable surface.
- Mark the drilling point, create a starter dimple, and secure the bit tightly in the chuck.
- Hold the drill straight with both hands, start slowly, and apply steady pressure without forcing it.
- Clear debris, prevent overheating, unplug the drill afterward, and inspect and store it safely.
Choose the Right Electric Drill
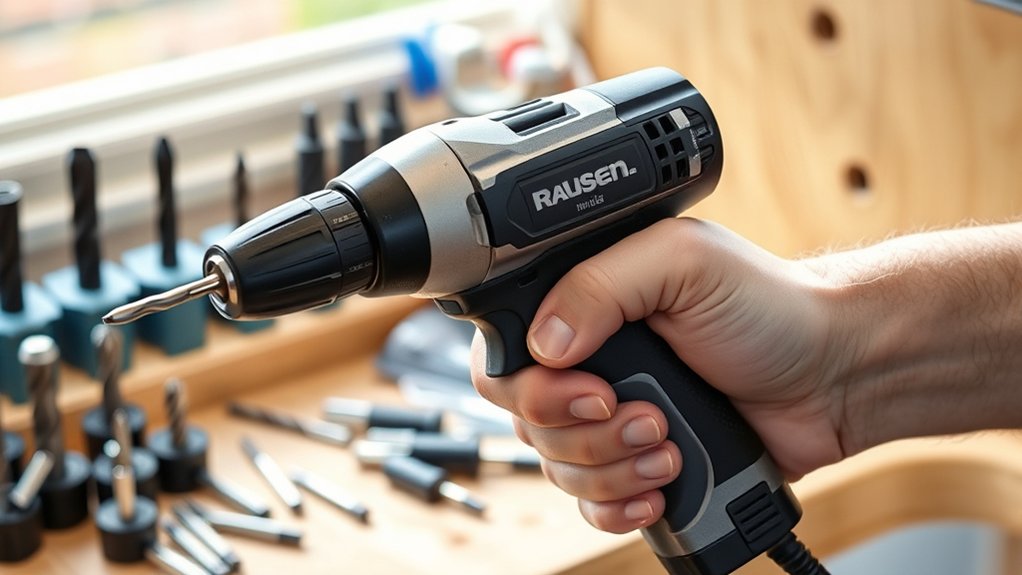
Choosing the right electric drill depends on the tasks you plan to handle. For occasional household projects, choose a compact cordless drill with adjustable speed and a clutch.
It’ll handle screws, pilot holes, and light repairs without excessive weight. If you’ll drill masonry, concrete, or thick materials, select a corded hammer drill or a powerful cordless model with hammer action.
Compare voltage, torque, battery capacity, and grip comfort before deciding. Higher voltage usually provides more power, but it can also add weight.
Consider chuck size, too. A 3/8-inch chuck suits most home tasks, while a 1/2-inch chuck accommodates larger accessories.
Match the tool to your expected drill bit selection, since different materials require compatible bits and operating speeds. Look for variable-speed control, forward and reverse functions, and a dependable warranty.
Finally, factor in electric drill maintenance. Models with accessible batteries, durable chucks, and available replacement parts will serve you longer and remain easier to maintain.
Gather Bits and Safety Gear
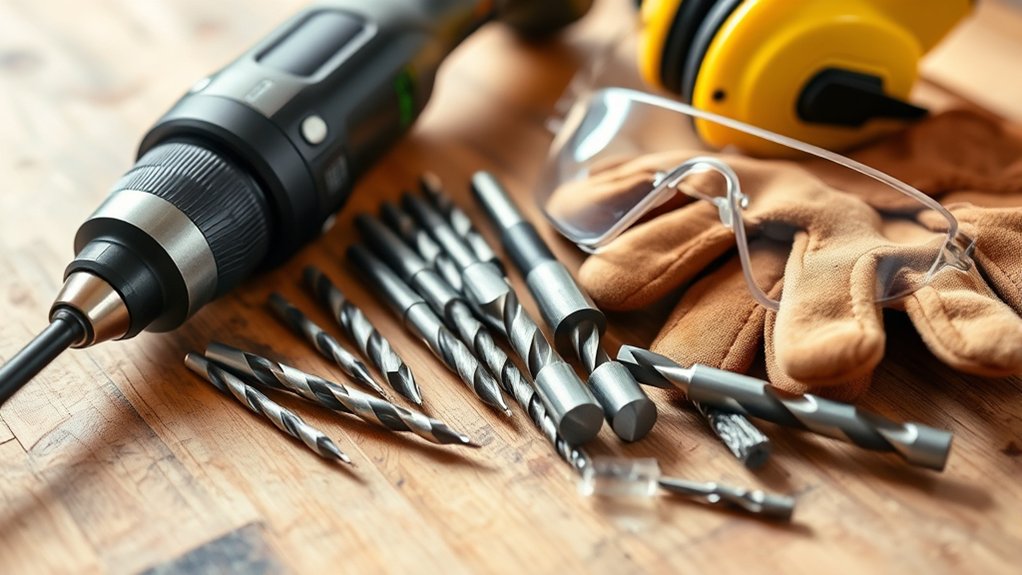
Before you begin, gather the drill bits and safety gear suited to your project. Check your project’s material, such as wood, metal, masonry, or plastic, and select bits designed for that surface. Choose the correct diameter and keep a spare bit nearby in case one becomes dull or damaged. Inspect each bit for cracks, bending, excessive wear, or a blunt tip; don’t use a damaged bit.
Put on safety glasses or protective goggles to shield your eyes from flying chips and dust. Wear safety gloves when they provide a secure grip and won’t catch on rotating parts. Remove loose clothing, jewelry, and dangling accessories, and tie back long hair.
Use hearing protection if you’ll drill for an extended period or work in a noisy area. Keep a dust mask available when drilling materials that create fine particles. Clear your workspace, ensure adequate lighting, and keep the drill’s power cord away from your work area. Don’t connect power yet.
Install and Tighten the Bit
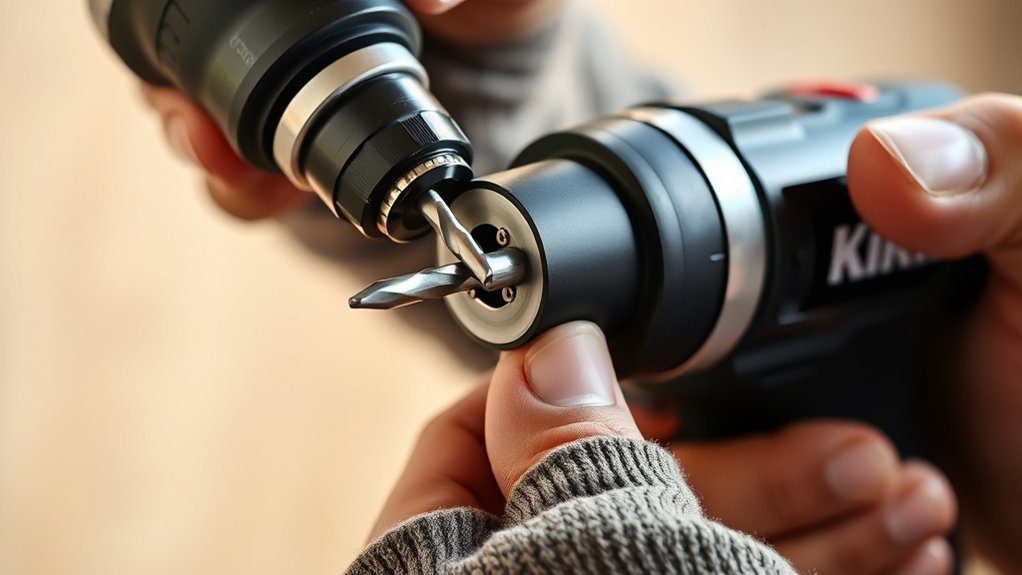
How you install the bit depends on your drill’s chuck: loosen a keyless chuck by twisting its sleeve counterclockwise, or use the chuck key on a keyed model to open the jaws. Check bit compatibility first; match the bit’s shank size and type to your drill’s chuck and the material you’ll drill.
Insert the bit straight into the chuck, pushing it in far enough for the jaws to grip its smooth shank. Don’t cover the fluted section, and remove any dust or debris that could prevent a firm hold.
For a keyless chuck, hold the drill body and twist the sleeve clockwise by hand until the jaws close. Apply steady pressure with your tightening techniques, but don’t force the sleeve.
For a keyed chuck, tighten each hole evenly with the chuck key, moving around the chuck for balanced pressure. Remove the key before starting.
Pull the bit gently to confirm it’s secure, then check that it sits centered and doesn’t wobble.
Mark and Secure the Workpiece
Mark the drilling point with a pencil, awl, or center punch, depending on the material. Measure carefully with a Measuring tape, and check the distance from each edge before you commit to the hole. For multiple holes, mark every location and confirm their alignment.
Place the workpiece on a stable, level surface. Keep the marked area fully supported, especially near an edge, so the material won’t flex or crack. Use Clamping tools to hold it firmly, but tighten them gradually to avoid dents or distortion.
- Clamp wood to a sacrificial board to reduce tear-out.
- Protect finished surfaces with cardboard or a soft cloth.
- Keep your hands clear of the drilling area.
Check that nothing sits beneath the intended hole, including cables, pipes, or your workbench. Reposition the piece if necessary. Give the workpiece a final visual check, then secure it again if it shifts.
A well-marked, stable surface helps you drill accurately and safely.
Set Speed and Rotation Direction
Choose a speed that suits both the task and the material you’re drilling. Set the rotation direction to forward for drilling, or to reverse when removing screws or backing out the bit. Adjust the speed carefully to match the material so you have better control and avoid damage.
Choose the Right Speed
Before drilling, set the speed and rotation direction to match the bit and material. For this step, focus on speed control: choose a slower setting for large bits, hard materials, and starting holes.
Use a faster setting for small bits and softer materials, but don’t force the drill if it strains or overheats. Check your drill’s manual for recommended ranges, then test the speed on scrap material.
A steady pace improves drill performance and helps prevent burned bits, chipped surfaces, and wandering holes.
- Start slowly until the bit grips the surface.
- Increase speed gradually when the hole stays centered.
- Ease off if you smell burning, feel excessive heat, or hear unusual noise.
Keep your grip firm, apply light pressure, and let the bit cut at its selected speed. Adjust speed before drilling rather than changing it mid-hole whenever possible.
Set Rotation Direction
Set the rotation direction to forward so the bit turns clockwise and cuts into the material. Locate the forward/reverse selector near the trigger, then identify its symbols or arrows. This control changes the drill’s rotation, allowing the bit to move clockwise or counterclockwise.
Release the trigger completely before changing direction. Slide the selector fully toward the forward symbol, and don’t force it if it won’t move.
Check the switch operation by briefly squeezing the trigger while keeping the bit away from your body and the workpiece. Confirm that it spins clockwise when viewed from behind the drill.
Use reverse only to back a bit out of a hole or remove a screw. Never change direction while the motor runs, because doing so can damage the selector, strain the gears, or cause sudden movement.
Match Speed to Material
Match the drill’s speed to the material and bit so you get clean results without overheating the tool. Check the manufacturer’s guide for material compatibility, then choose a suitable setting.
Use lower speeds for metal, large bits, and dense materials. Use higher speeds for wood, plastic, and small bits. Start slowly, increase speed gradually, and keep steady pressure without forcing the drill.
- Set the clutch to a light setting when driving screws, then increase it only if the bit slips.
- Use speed adjustment controls to fine-tune performance as the bit enters different materials.
- Select forward rotation for drilling and driving. Switch to reverse to remove screws or back out a stuck bit.
Test your setting on scrap material first. If the bit overheats, the hole burns, or the motor strains, stop and reduce speed. Let the bit cut efficiently.
Hold the Drill Steady
Hold the drill firmly with both hands, and keep it aligned with the marked point as you work. This helps you drill accurately and safely.
Maintain Firm Grip
Keep both hands on the drill when possible, placing one on the handle and the other on the auxiliary grip or the back of the tool. Wrap your fingers securely around each handle, but don’t squeeze so tightly that your hands tire quickly.
Good grip ergonomics reduce hand fatigue and give you better control during extended tasks.
- Keep your wrists straight and relaxed while you work.
- Press the drill firmly enough to prevent slipping, without straining your arms.
- Pause briefly when your hands feel tired, then adjust your grip before continuing.
Use the drill’s handle texture and side grip to improve comfort. Wear gloves only if they fit well and don’t reduce your control.
Before squeezing the trigger, check that your fingers sit comfortably and won’t slide toward moving parts. A steady, comfortable hold helps you work safely and efficiently.
Keep Drill Aligned
With a comfortable grip in place, position the drill so the bit points straight at the work surface. Keep your wrist aligned with the drill and your elbow close to your body.
This position helps you apply steady pressure without forcing the tool sideways. Watch the bit’s entry point, and don’t let the drill tilt as it penetrates the material.
For larger holes, begin slowly, then increase speed while maintaining the same alignment. Match your technique to different drill bit types; some require lower speeds or extra care to prevent slipping.
If the bit wanders, release the trigger, let it stop, and reposition it before continuing. Regular drill maintenance, including checking the chuck and tightening loose parts, also helps the tool run smoothly and stay easier to control.
Drill a Straight Pilot Hole
Align the drill bit with your mark, then squeeze the trigger gently while applying steady, even pressure. Keep your wrist straight and let the tool do the work.
Watch the bit enter the material without forcing it sideways. A slow, controlled speed helps you maintain accuracy, especially on hard surfaces.
Choose among drill bit types based on your material: use a twist bit for wood or metal, a masonry bit for brick or concrete, and a brad-point bit for clean wood holes.
Mark the pilot hole depth with painter’s tape wrapped around the bit. Stop when the tape reaches the surface, so you won’t drill too far.
- Start perpendicular to the surface.
- Pause briefly to clear dust and check alignment.
- Keep your eyes on the entry point.
Release the trigger before pulling the bit out. Let it stop completely, then inspect the hole for a clean, centered opening.
Enlarge Holes and Drive Screws Safely
Once you’ve drilled a pilot hole, enlarge it gradually using the correct bit and steady pressure. Keep the drill aligned, secure the workpiece, and wear eye protection.
Next, set the clutch to a low setting and drive each screw straight until it’s snug. Stop before the screw head strips.
Enlarge Holes Safely
To enlarge an existing hole safely, choose a drill bit slightly larger than the opening and secure the workpiece before drilling.
Follow these safety precautions: wear eye protection, remove loose clothing, and keep your hands away from the bit.
Mark the desired diameter with a pencil, then select a bit designed for your material. Place a scrap board beneath thin wood to reduce splintering.
Use these drilling techniques:
- Start the drill at low speed so the bit won’t wander.
- Apply steady, gentle pressure without forcing the bit.
- Pause occasionally to clear dust and prevent overheating.
Keep the drill aligned with the original hole, and let the bit cut gradually.
If the workpiece shifts, release the trigger immediately and reposition it. Wait until the bit stops completely before checking the enlarged opening or removing debris.
Drive Screws Securely
After enlarging the hole, you can drive the screw securely by choosing a bit that matches its head and setting the drill to a low or medium speed.
Check the screw type selection before you begin; wood screws suit timber, while self-tapping screws work well with thin metal.
Insert the bit firmly, align it with the screw head, and apply steady forward pressure. Start slowly to prevent slipping, then increase speed slightly as the threads grip the material.
Stop when the screw sits flush, but don’t overtighten it, or you could strip the head or damage the surface.
Use these screwdriver techniques for better control: hold the drill straight, support the workpiece, and release the trigger before the bit wobbles.
Wear eye protection, and keep your free hand clear of the rotating bit.
Avoid Slipping and Overheating
Keep firm, even pressure on the drill so the bit doesn’t slip or bind. Hold the tool straight and let the bit cut at its own pace.
For reliable slip prevention, mark your drilling point and use a center punch to create a small starting dimple. Select the correct bit for the material, and tighten it securely in the chuck before you begin.
Watch for heat buildup, especially when drilling metal, hardwood, or thick material. Ease off the trigger if the bit starts smoking, squealing, or turning blue.
Let the bit cool briefly, then continue with a slower speed and light pressure. Cutting oil can reduce friction when you drill metal, while pilot holes can make deeper work easier.
- Use both hands for better control and steadier alignment.
- Keep the bit sharp; dull edges create excess friction and heat.
- Clear chips occasionally so they don’t clog the hole or strain the motor.
Never force the drill, and stop immediately if it catches or vibrates unusually.
Clean and Store the Drill
Once you’ve finished drilling and the bit has cooled, unplug the drill and brush away chips and dust from the chuck, vents, and housing. Use a dry cloth for the casing, and gently clear stubborn debris with compressed air. Don’t immerse the tool or spray cleaner into its openings.
Wipe the bit, inspect it for damage, and remove it from the chuck before storage.
| Task | Best practice |
|---|---|
| Cleaning tips | Brush debris away; keep vents clear |
| Storage solutions | Use a dry case or shelf |
Coil the cord loosely without sharp bends, or remove the battery if you’re using a cordless model.
Store batteries separately in a cool, dry place, away from metal objects and direct sunlight.
Keep the drill in its case or on a stable shelf where moisture, extreme heat, and falling tools won’t damage it.
Check the cord, chuck, and battery periodically, so you’ll spot wear before your next project. A clean, dry drill will work more reliably and last longer.
Frequently Asked Questions
Can I Use an Electric Drill on Concrete or Masonry?
Yes, you can use an electric drill on concrete or masonry, but choose the right tool and technique. For light work, use a hammer drill with a carbide-tipped masonry bit.
Drill bit selection matters: match the bit size and material to your anchor. Follow safety precautions by wearing eye protection, securing the workpiece, checking for hidden wiring or pipes, and applying steady pressure.
For thick concrete, use a rotary hammer instead.
How Do I Change a Drill’s Battery Safely?
To change your drill’s battery safely, switch off the tool, remove its charger, and press the release tabs before sliding out the old pack. Check Battery compatibility: install only the manufacturer-approved voltage and model.
Inspect the replacement for cracks, swelling, or damaged contacts. Insert it until it clicks securely.
For Charging safety, use the correct charger on a dry, ventilated surface, and unplug it when fully charged. Never modify or short-circuit batteries.
What Should I Do if the Drill Suddenly Stops Working?
If your drill suddenly stops working, release the trigger and disconnect its power supply. Check the battery charge, seating, and contacts, or inspect the cord and outlet if it’s corded.
Let the tool cool for fifteen minutes because overheating can trigger protection. Remove the bit and test the drill again briefly.
If it still won’t run, unusual sounds or smells may indicate motor issues. Don’t open the housing; contact a qualified technician.
Can an Electric Drill Be Used as a Screwdriver?
Yes, your electric drill can moonlight as a screwdriver. Choose the correct driver bit, matching the screw head, and secure it firmly in the chuck.
During drill bit selection, pick a bit designed for screws rather than drilling. Use torque adjustment to start with a low setting, which helps prevent stripped heads and damaged materials.
Keep the drill straight, squeeze the trigger gently, and increase speed only when needed.
How Often Should I Have My Electric Drill Professionally Serviced?
You should have your electric drill professionally serviced every one to two years with regular use, or annually if you use it heavily, commercially, or in dusty conditions.
Arrange service sooner if you notice unusual noise, overheating, reduced power, burning smells, or damaged cords.
Maintenance tips: clean vents, inspect the chuck, and follow the manufacturer’s schedule.
Safety precautions: unplug the drill before checks, replace worn parts, and use qualified technicians.
Conclusion
With these steps, you’re ready to use an electric drill confidently, but don’t rush the final moment. Check your bit, secure your workpiece, and keep your hands clear before squeezing the trigger.
A steady start prevents costly slips, while the right pressure protects both your project and your tool. When the hole or screw is finished, release the trigger, unplug the drill, and store it safely.
That last careful choice keeps your next project ready to begin.