7 Steps for an Easy Start on Your Weed Eater Every Time
Starting a weed eater shouldn’t feel like a struggle, but many people deal with frustrating stalls, hard pulls, and uncertainty about the correct starting steps. You’re not alone. With the right preparation, getting an easy start on your weed eater every time can be much simpler.
Inspect your weed eater for damage, secure the guard, and put on eye protection, gloves, long pants, and sturdy shoes. Fill it with fresh, correctly mixed fuel. Set it on level ground, press the primer bulb, and close the choke for a cold start. Hold it firmly and pull the starter cord smoothly.
Once it runs, open the choke gradually. If it stalls, check the fuel, spark plug, and choke for problems; the steps below can help you troubleshoot further.
Key Takeaways
- Inspect the weed eater for damage, secure attachments, fuel leaks, and a properly fitted guard before starting.
- Use fresh, correctly mixed gasoline and two-stroke oil. Follow the manufacturer’s specified ratio and fuel requirements.
- Prime the engine until the bulb feels full. Then place the trimmer level on stable ground away from people.
- Set the choke correctly, keeping it closed for cold starts. Pull the starter cord smoothly with controlled, steady strokes.
- Once running, gradually open the choke and warm the engine for about 30 seconds. If it stalls, troubleshoot the fuel, spark plug, or carburetor.
Check the Trimmer and Wear Safety Gear

Before starting your weed eater, inspect the trimmer for loose parts, fuel leaks, damaged cords, or a cracked cutting head. Check that the guard, handle, and cutting attachment fit securely.
If you notice damage, don’t operate the tool until you repair or replace the faulty component. This simple inspection supports effective trimmer maintenance and helps prevent sudden failures while you work.
Next, put on the right protective equipment. Wear safety glasses or a face shield to block flying debris, sturdy gloves for grip, long pants, and slip-resistant, closed-toe shoes.
Use hearing protection if you’ll run the trimmer for an extended period. Tie back long hair and remove loose clothing or jewelry that could catch on moving parts.
Clear bystanders, pets, and obstacles from your work area before starting. Review the owner’s manual, identify the controls, and follow all safety precautions.
Keep the cutting head away from your body, and never bypass a guard or safety switch.
Use the Correct Fuel or Oil Mixture
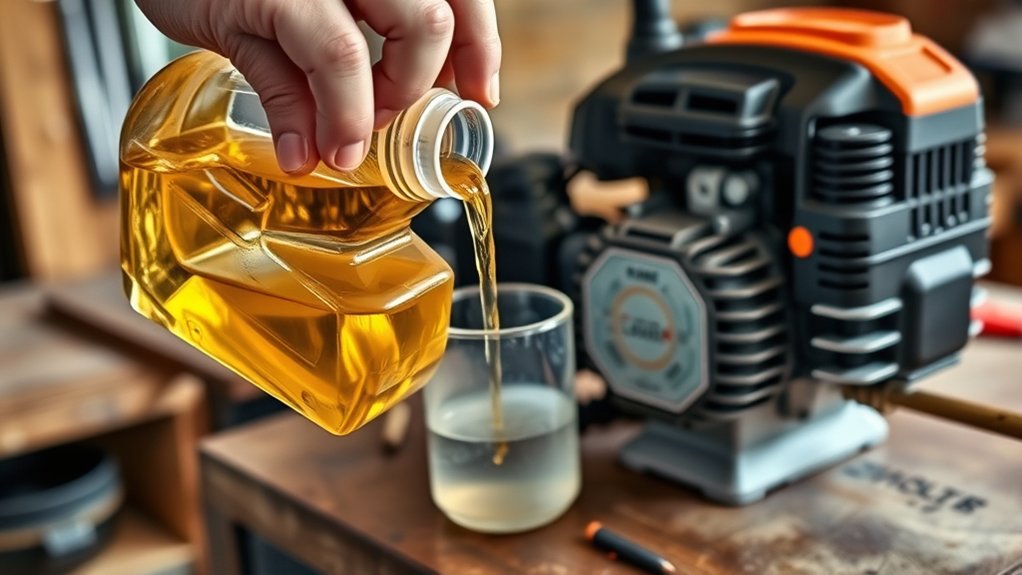
Check your weed eater’s fuel requirements before filling the tank. Be sure to mix the oil and gasoline in the correct ratio. Then, store the blend safely in an approved container.
Check Fuel Requirements
Using the correct fuel keeps your weed eater running smoothly and helps prevent starting problems. Check your owner’s manual before filling the tank, because each model may require regular gasoline, a specific octane rating, or a manufacturer-approved fuel type. Don’t guess based on another tool’s requirements.
- Choose fresh fuel from a clean, approved container to protect fuel quality.
- Inspect the tank and cap for dirt, leaks, or damage before refueling.
- Follow storage safety practices, including keeping fuel away from heat, sparks, children, and pets.
Avoid old, cloudy, or contaminated gasoline, which can clog the carburetor and make starting difficult. If your model uses premixed fuel, buy the correct ready-to-use product rather than substituting automotive fuel. Confirm the fuel label matches your manual every time.
Mix Oil Properly
If your weed eater has a two-stroke engine, mix the gasoline and two-stroke oil at the exact ratio listed in the owner’s manual. Accurate oil mixing protects the engine and helps it start without unnecessary strain.
Use a clean, approved container with clear measurement markings, and measure both liquids carefully rather than estimating. Add the specified amount of oil to the gasoline, then seal the container and gently shake it until the contents blend evenly.
This step creates consistent fuel throughout the mixture, reducing the risk of running too lean or too rich. Don’t use automotive oil, leftover mixed fuel, or an unapproved additive.
If your model uses straight gasoline, don’t add oil. Always confirm the fuel requirements before preparing the mixture, and pour it carefully into the tank.
Store Fuel Safely
Store fuel in a tightly sealed, approved container labeled for gasoline, and keep it in a cool, well-ventilated place away from sparks, flames, and direct sunlight. Use a clean fuel container designed for gasoline, not a household bottle, and label it with the oil-to-gas ratio and mixing date.
Follow your weed eater’s manual precisely. The wrong mixture can cause hard starts, overheating, or engine damage. Your storage precautions should also include:
- Mix only enough fuel for about 30 days.
- Keep the container upright and away from children and pets.
- Never store fuel near your home, water heater, or other ignition sources.
Before each use, gently swirl the mixture to recombine the oil, then inspect it for separation, cloudiness, or debris.
Dispose of stale fuel through an approved local hazardous-waste program. Never pour it onto soil or down a drain.
Prime the Weed Eater Fuel System
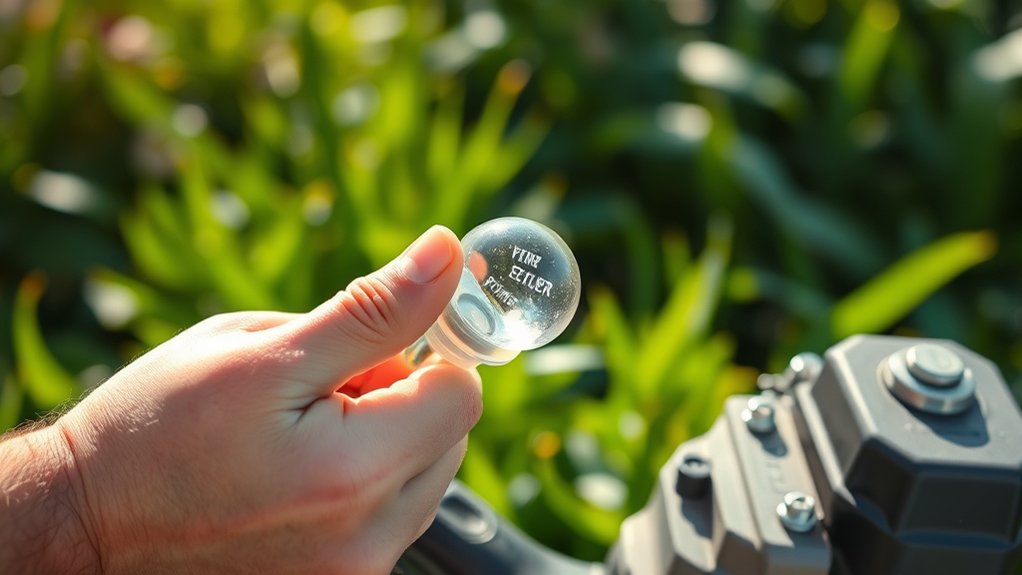
Prime the fuel system before pulling the starter cord so fuel reaches the carburetor. Find the small, flexible primer bulb near the carburetor or fuel tank. Press it slowly several times, usually five to ten, until you see fuel move through the clear return line or the bulb feels full. Follow your owner’s manual if it specifies a different number.
During the priming process, keep the weed eater on a stable, level surface. Hold the cutting head away from people, pets, and objects. Don’t squeeze the bulb rapidly; steady presses work better and reduce air bubbles.
If the bulb won’t fill, check that the fuel cap is secure, the tank contains fresh fuel, and the fuel lines aren’t cracked, kinked, or disconnected. A damaged bulb may also prevent proper priming. Wipe away any spilled fuel before you continue.
Once fuel circulates normally, you’re ready for the next starting step.
Set the Choke for a Cold Start
- Check the lever’s symbols: closed usually indicates cold starting, while open indicates normal running.
- Keep the choke closed during initial starting attempts, but watch for signs of flooding.
- Move it gradually toward open as the engine warms and begins responding smoothly.
Proper Choke adjustment depends on temperature, fuel condition, and your specific model. If the engine has sat overnight, begin fully closed.
If it’s warm from recent use, choose a partially open or open setting instead. Never force a stiff lever; inspect the linkage for dirt or damage.
Follow your manual’s markings, since some designs reverse traditional labels. A correct setting helps the engine start efficiently and prevents excessive fuel buildup.
Start the Weed Eater With the Cord
Once the choke is set for the engine’s temperature, place the weed eater on level ground and hold it firmly. Check that the cutting head doesn’t touch grass, stones, or other objects before you pull the starter cord.
Grip the handle securely with one hand and use the other to pull the cord slowly until you feel resistance. Then give it a quick, smooth tug, keeping the cord aligned with its housing.
Don’t wrap the cord around your hand, and release it gently instead of letting it snap back. Good cord safety protects your fingers and prevents damage to the recoil mechanism.
Repeat the pull as needed, using steady movements rather than harsh yanks. Keep your feet planted and maintain control of the tool throughout the process.
If you’re using an electric model, inspect the cable first, choose a suitable extension length, and keep the connection away from wet ground. Stop immediately if the cord frays, sticks, or fails to retract.
Switch Off the Choke After Starting
As soon as the engine starts and runs smoothly, move the choke to the “run” or open position. Leaving it closed restricts airflow, wastes fuel, and can make the engine run too rich.
Make the change gradually if the engine sounds uneven, allowing a few seconds between choke adjustments.
During cold start techniques, you may need partial choke briefly while the engine warms. Don’t squeeze the throttle aggressively during this transition.
Instead, hold the weed eater securely, keep the cutting head clear, and listen for a steady idle. Once the motor responds normally, open the choke fully before trimming.
- Move the lever slowly to prevent stalling.
- Let the engine warm for about 30 seconds.
- Keep the tool level and pointed away from people.
If the engine starts but dies when you open the choke, return it to partial choke momentarily and try again.
Avoid extended operation with the choke engaged, since it can foul the spark plug and reduce performance. Follow your owner’s manual for the correct lever position and warm-up time.
Troubleshoot Fuel, Choke, and Spark Problems
If the engine still stalls after you open the choke, check the fuel, choke setting, and spark plug before pulling the starter repeatedly. Confirm that fresh, correctly mixed fuel fills the tank.
Old gasoline, an incorrect oil ratio, or a clogged fuel filter can prevent starting. Inspect the fuel system for cracked lines, leaks, or a blocked tank vent, and replace damaged parts.
Next, move the choke to the recommended position for a warm engine. A closed choke can flood the engine, while an open choke may provide too much air during a cold start.
If you smell fuel, wait several minutes with the choke open before trying again.
Remove the spark plug and inspect its tip. Clean light deposits, check the gap against your manual, and replace a wet, cracked, or heavily worn plug.
Reconnect the plug wire firmly. If the engine still won’t run, have a technician test the ignition coil and carburetor.
Frequently Asked Questions
How Often Should I Replace My Weed Eater’s Spark Plug?
Replace your weed eater’s spark plug about once each season, or every 25–50 operating hours, depending on your manufacturer’s guidance and usage. Inspect it sooner if your trimmer starts poorly, idles roughly, misfires, or loses power.
Heavy Lawn care, dusty conditions, and improper fuel can shorten plug life. During Equipment storage, remove and check the plug, clean or replace it as needed, and install the correct type with the specified gap.
What Maintenance Prevents Weed Eater Problems Between Uses?
Prevent weed eater problems between uses by cleaning grass and debris from the guard, head, and air vents. Inspect the line, blade, shaft, and fasteners, replacing damaged parts promptly.
Perform Blade sharpening when cutting becomes uneven, and check Fuel mixture adjustment if the engine runs poorly. Empty the fuel tank before long storage, or add stabilizer and run the engine briefly.
Store your trimmer dry, covered, and upright.
How Should I Store My Weed Eater During Winter?
Store your weed eater for winter by draining the fuel, running the engine dry, and cleaning grass from the guard, head, and air filter. Remove the spark plug, add a few drops of engine oil, and pull the starter gently before replacing it.
Keep the tool upright in a dry, ventilated area away from heaters. For garden safety, secure sharp attachments in labeled storage containers, lock them away, and keep children out.
Can I Use Attachments With My Weed Eater?
Yes, you can use attachments with your weed eater if its design supports them. Check your owner’s manual for attachment compatibility before buying anything.
Many models accept accessories such as edgers, brush cutters, cultivators, pole pruners, and blowers, but connection systems differ between brands and models.
Don’t force an attachment onto the shaft. Turn off the engine, follow the installation instructions, and confirm every connection locks securely before operating the tool.
When Should I Replace the Trimmer Line?
Replace your trimmer line when it becomes too short, frayed, brittle, or breaks repeatedly during use. You’ll also need new line if trimming performance drops or the head stops feeding properly.
Trimmer line longevity depends on grass thickness, obstacles, storage conditions, and how often you use the tool. For reliable line replacement frequency, inspect the spool before each job and replace damaged line immediately.
Keep spare line nearby so interruptions won’t slow you down.
Conclusion
With these seven steps, you’ll turn a stubborn weed eater into a dependable tool. Check its condition, use the right fuel mix, prime it, set the choke, pull the cord safely, and ease the choke open once it starts.
If it still refuses, inspect the fuel, spark, and air paths methodically. Think of starting a weed eater like waking a tired campfire: the right fuel, airflow, and patience matter more than force.
Soon, each pull should feel routine. These steps can help you start your weed eater easily and keep it ready for the next job.